A great starting category, New Game+ (Unrestricted) starts you with all major items, pages, and consumable items you need—and you get to fly.
This run is considerably shorter than Any%, as you don't need to seek out the Orb, Dagger, Wand, Sword, or Orange Peril Ring (and other trinkets). With all pages, there is also no Heir fight at the conclusion of the run. Your stats can start at any upgrade level, so there's no need to be concerned with tight MP routing.
It feels like cheating (in a good way), is super fun, and is a great ramp-up to a more fragile category.
Download NG+ SaveIRC Start
Use the "Ice Rod Cancel" to get a huge head start
- As soon as the in-game timer starts, shoot an ice beam to cancel the opening camera pan. Immediately begin running toward the first Overworld save.
- The camera will pan up to meet you about halfway to the save point. Save at the Overworld save.
Enter Quarry
Use Ladder Storage to quickly head over to Quarry
- Head west to the key and use the wand to zap the bushes.
- Use ladder storage off the top of the nearby ladder and run to the Forbidden Pass.
- Power the first fuse, head into Quarry and power the second fuse.
Ziggurat Door Skip
Use Ladder Storage to avoid powering the Ziggurat door
- After entering the Forbidden Pass, DO NOT power the fuses. Run to the unpowered save in Quarry and use ladder storage off the top of the nearby ladder.
- Run directly up and adjust slightly left as you run.
- Aggro the sniper, veer to the right, and then back toward the sniper. They should strike you, drop you out of LS, and land you on the roof.
- Run to the center of the top-left wall, wait for a Scavenger to charge, and grapple him down to you.
- Roll right and run down--the Scavenger should run to the right.
- Ice-grapple and continue to grapple until you are pulled through the wall and fall.
- Fire 3 neutral ice-beam shots quickly as you start to fall, else you will hit a death plane.
- Once you land, roll back towards the door to hit the loading zone.
Quarry Skip
Clip off the ledge and run directly to Ziggurat
- Make sure the speedrunner code is active—this is best done just after the second fuse. This requires the Orb, Dagger, Wand.
- Walk to the edge of the broken fuse north of the shrine, target the nearest Scavenger and grapple him to you. They should begin to fall into the miasma.
- Let them fall several frames and then ice grapple them. You should immediately fall into the lower Quarry.
- As you are falling, equip Effigy over Orb and move your cursor to Sword. When you regain control, run to the Ziggurat in a tight line around the debris.
- Immediately pause, quit, and continue upon entering the Ziggurat. This will reset your HP bar to its pre-miasma state.
Ziggurat Elevator Skip
Effigy to dismount the elevator, ice beam to fall
- Equipment required: Effigy, Dagger, Wand
- Activate the large elevator and walk to the south edge (bottom-right screen space). While waiting, type in the speedrunner code.
- As soon as you see a glimpse of the fox after the screen blacks out:
- This should all happen within frames of each other, one step immediately after the last. The fox should fall to the platform below and get up quickly.
Upper Ziggurat
Clear the fairies without losing time
- Run past the fairies and hug the north edge of the upper descending path (to avoid triggering the 3 addl. fairies).
- At the catwalk corner, turn and dispatch all but one fairy with the wand. Ice-beam the switch across the gap and equip sword.
- Continue to the Administrator tower, dodging the lone remaining fairy.
Admin Skip (Ladder Storage)
Use Ladder Storage to skip the Admin Tower.
- Approach the Admin Tower and ladder storage off of it with the sword.
- While in LS, run left of the tower as the camera turns to the back-left corner. After a second of leaving the catwalk area, start mashing attack with the sword.
- When the fairy chasing you readies a shot, quickly target the fairy (while still mashing).
- If positioned correctly, you will be hit with the bolt, be knocked out of Ladder Storage, and fall into a loading zone to Lower Ziggurat.
Wrong Warp
Warp to the end of Lower Ziggurat.
- Exit the Lower Ziggurat back into the fuse factory. Make sure your equipment set is Effigy, Dagger, Wand.
- You must Quit to Menu before attempting WW. Otherwise your fall speed will not be reset from skipping the Admin Tower.
-
The goal is to re-enter the Lower Ziggurat scene and use the effigy on the same frame:
- If you are too early, you will start to throw the effigy. Pause, Quit to Menu, and try again.
- If you are too late, you will simply emerge into Lower Ziggurat as normal. Walk back north and try again.
- If you are successful, the fox's feet will "snap" to be parallel and you will hear the faint beginning of the effigy animation when the screen turns black.
- On success, when you load in, fire one ice beam up-left and 3x more neutral (no direction). You should land on the lower catwalk that takes you to the Boss Scavenger.
Boss: Scavenger (Grapple Off)
Push the Scavenger off the left side of the arena
- Make sure the speedrunner code is active. Equipment required: Orb, Dagger, Wand.
- If you have 12 or more mana: Run up and ice-grapple the Scav at max orb distance. Position yourself to the right of the Scav and blast it with two wand shots until the ice breaks.
- Otherwise, ice-beam the Scav from a distance and run to position yourself to the right of the Scav. Wait for it to thaw naturally.
- Immediately re-freeze the Scav during thier "ice-break" animation and grapple repeatedly (usually 3x) until the Scav is off the left arena edge.
- If done quickly and correctly, the Scav will pop into the death plane. Obtain the Blue Key, equip a bomb, and use it to death warp. Be sure to use the death animation to menu.
Boss: Scavenger (Fight)
Fight the Scavenger with ice-combo
- Equipment required: Sword, Dagger, Wand. Make sure the speedrunner code is active.
- Run up to the Scavenger and execute the ice combo.
- Obtain the Blue Key, equip a bomb, and use it to death warp. Be sure to use the death animation to menu.
Warp to Atoll
Overworld West -> Atoll
- Run left of the Overworld Save and down the ladder
- Run to the warp pad from the right side
- (Muffling Bell will stop any aggro)
- Warp to Atoll (bottom-left warp pad)
NW and SW Fuses
Grapple some frogs and birds
NW Fuse
- Walk down the left staircase and 180 behind it to the beach. Walk to the inner corner, target the frog and shoot it with wand. This timing is tight; if you are slow here, the frog may walk away.
- When the frog approaches, ice-grapple him and run to activate the fuse. The frog will thaw, approach and may attack but typically will not hit you (you can ice-beam him while praying if you wish to be safe).
- As soon as the fuse is active, move to the inside pocket of the brick wall and grapple down to the lower hook. Immediately re-target the next hook and grapple to it.
SW Fuse
- Run south toward the next fuse, hugging the lower side of the area to avoid aggro-ing enemies.
- When you reach the mountain, walk behind it to the NE edge and ice-grapple the small blue bird at the top.
- Move away from the frozen bird and activate this fuse. Quit and continue as soon as the power line lights up.
NE and SE Fuses
Pray for good crabs
NE Fuse (3)
- Walk down the right staircase and run against the farthest right point. Target the group of crabs and fire a wand shot.
- As soon as it strikes, re-target another crab and ice-grapple it.
- Immediately and quickly run up and activate the fuse. The crabs are unfortunately a bit RNG; consider freezing one to jam them up.
SE Fuse (4)
- As soon as the fuse lights, orb down to the hook to the south and walk south along the brick catwalk. Target and ice-grapple the south-most small crab and head SW.
- Run to the white tree and grapple to the closest hook. Immediately grapple across the water to the next hook. Run past the crabs. The larger crab can be a good way to damage down to critical HP.
- Run to the SE corner of Atoll, up a couple ladders, and activate the last fuse. Pause, quit, and continue as soon as the power line lights up.
The Library
Pray at the powered warp and enter Library
- Run down to the center of Atoll, avoiding crabs. Pray at the powered device, warp, and enter the Library.
- Walk up the right set of stairs, up the ladder, through the next room, and up another ladder.
- Orb to the tuning fork and equip Sword as you travel. Ascend ladder to the librarian.
Boss: The Librarian (Fight)
Fight the librarian with ice-combo
- Type in the speedrunner code while climbing the ladder.
- Approach the boss and:
- Retrieve the key, throw a bomb, and death warp.
Enter Forest Fortress Area
Damage down along the way
Two options here, both with similar times:
- Grapple up to the tuning fork NE of Overworld Shrine.
- Grapple to the next tuning for to the east.
- Target and ice-grapple the blue slime below.
- Run to the group of slimes and damage down to critical.
- Enter the Forest Fortress area.
- Grapple up to the tuning fork NE of Overworld Shrine.
- Activate the shortcut lever.
- As soon as it pops up slightly, pause/quit/continue.
- Run to the group of slimes and damage down to critical.
- Enter the Forest Fortress area.
Enter Forest Fortress
Ice-grapple across the moat
- Walk to the tip of the broken stairs and grapple to the NE tuning fork.
- Run past the well and to the jagged tip of the moat by the drawbridge.
- Ice-grapple the wizard to the left to cross the moat. Enter the Forest Fortress.
Sealed Door Clip
Knock back and ice-grapple through the golden door
- Enter the room and run to the top of the stairs.
- Hold target, fire 2 wand shots, 1 ice-beam, and grapple 2-3x.
Boss: Siege (Stunlock)
Use Orange Peril Ring to break poise and stunlock Siege Engine
- Make sure you are in peril state (Under 20% HP)
- Run to the Siege Engine and approach from the side.
- Roll to the middle just behind the center piece behind the face.
On first hit, the Siege will start to wake. For this phase:
- If you are at ATT 1, use 1-2 combos and hit 8x to break poise.
- If you are at ATT 4+, use 1-2 combos and hit 5x to break poise.
- After the poise break, wait a beat before attacking again.
Once the boss staggers backwards, hold target and:
- If you are at ATT 1: spam 1-2-3 combos to break poise. Continue this technique until the end of the fight.
- If you are at ATT 4+: use 1-2 combos and hit 5x to break poise. Continue this technique until the end of the fight. After each poise break, wait a beat before attacking again. Otherwise you will swipe while the boss is recoiling, miss, and break out of the stun-lock.
- Once the screen begins to fade from white, use this time to menu for the next step.
- Obtain the Plinth Key and run to the plinth. Interact with it, select OK, and immediately pause/quit/continue.
Obtain Red Key
Obtain Red Key and immediately death warp away
- Run to the Red Key, interact, and acquire it.
- Toss a bomb at the stairs and death warp. Use the death animation time to menu for the next step.
Temple Door Clip
Use a large slime to ice-grapple into the Sealed Temple
- Run SW of the Overworld save and locate the larger blue slime. If you are quick, it should always be the first enemy you can target in that corner.
- Grapple the slime up to you, roll back 2x, regain some stamina, and grapple the blob. Repeat until the fox's back is at the Golden Door.
- Walk around to position the slime between the door and fox and take four hits (or until critical HP). Ice-beam the slime and grapple until you clip through the door.
Drop Keys (IRC)
Use ice-rod cancel to drop all three (3) keys together
- Approach any key slot and activate to place the key.
- Use ice-beam, run to the next slot, drop another key.
-
Use ice-beam, run to the final slot, and either:
- Throw a bomb, drop the final key, and death warp, or
- Drop the final key, immediately pause, quit, and continue, then throw a bomb for death warp
Warp to Heir
- Run to the Overworld West warp point.
- Muffling Bell should prevent enemy aggro.
- Enter the middle warp pad in The Far Shore.
Heir Cutscene Skip
A free 15-second time loss
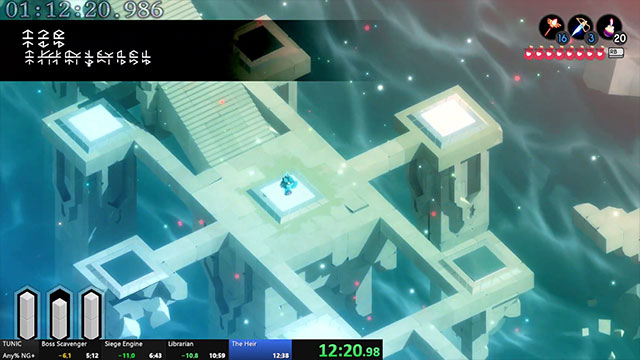
- Approach Heir until the button prompt appears. Press Pause and scroll down to "Quit to Menu".
- Press "B" on controller and immediately press confirm (usually "A").
- If it actually quits to the main menu, congrats, it (probably) worked; if the cutscene plays as normal, sorry it didn't work this time. Be sure not to die in this cutscene and as soon as you get your UI back: pause, quit and continue.
Turn in Completed Manual
Trigger Ending B and "time" for the run
- Run to and interact with the Heir.
- Scroll left once and select "OK".
- Time! You have finished the run!